
I grew up in a household that was deeply influenced by our Polish ancestry. One of the first things I ever learned to cook was pierogi….Well not cook per se, but every Christmas season my household was a mini pierogi-making factory. My dad was on rolling out the dough duty, us kids were on filling and creasing duty, and my mom was in charge of blanching and cussing out the pierogi that broke in the water. Is now the time to confess that I may have mis-creased some pierogies so that they would break?!?! That meant the instant gratification of eating them then rather than waiting for Christmas…..sorry Mom.
Pierogi making was a chore, mainly because of our stubborn dough recipe. However, after a chance meeting and random small talk with a woman in a doctor’s office waiting room, my family’s lives were changed forever. A woman my mom met had the tastiest, most pliable pierogi dough recipe!
Time! Pierogi! And Lives! have all been saved with the new-to-us recipe….well I am guessing on this last one…..but pierogi making did get intense at times.
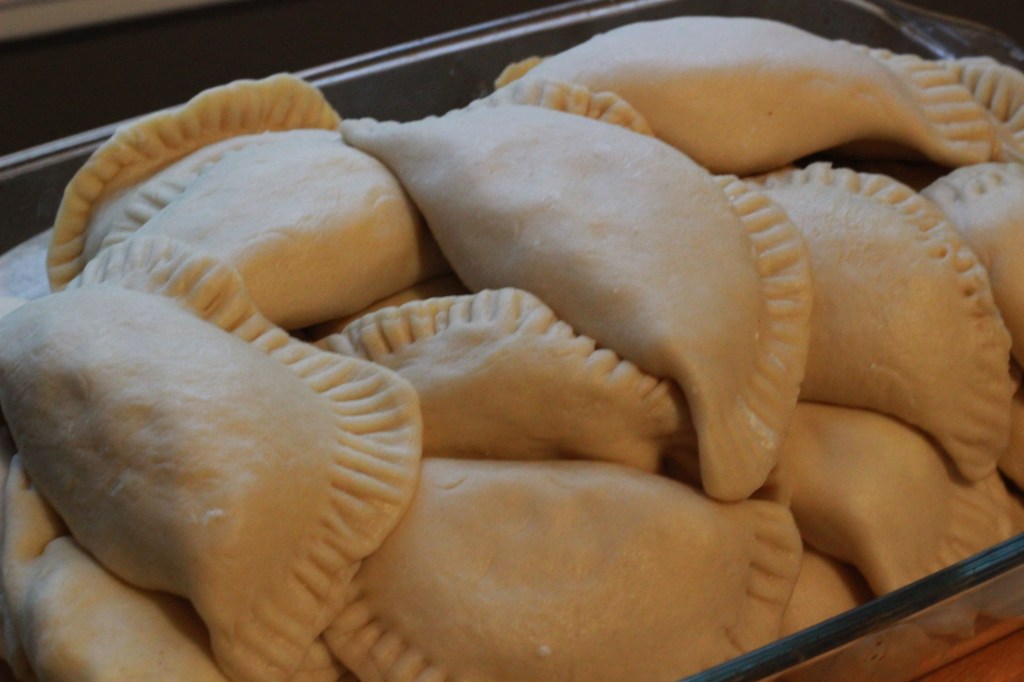
Now I promised to do a healthier eating blog. One thing pierogi are not is healthy. If you are unfamiliar with pierogi, I should explain they are a dumpling. Most cultures have dumplings. The main difference though is in other cultures, dumplings are usually dough stuffed with cheeses (think ravioli) or meats (think wontons)….but not the Polish people. Nope….Polish people decided to stuff carbs with carbs! The most popular and tastiest pierogi is potato and cheese stuffed! Though my family also does a cabbage and mushroom one.
While pierogi making is tedious, it is a fun dish to involve the whole family….kids as young as two can help out…..trust me…..I know from experience!!
When making pierogi, it is best to make the filling the day before so that it is thoroughly chilled, making it easy to work with. Once the filling is made, the battle is ready to begin.
Potato and Cheese Pierogi Filling Recipe yields….a million possibly but I am incapable of making less in one sitting!
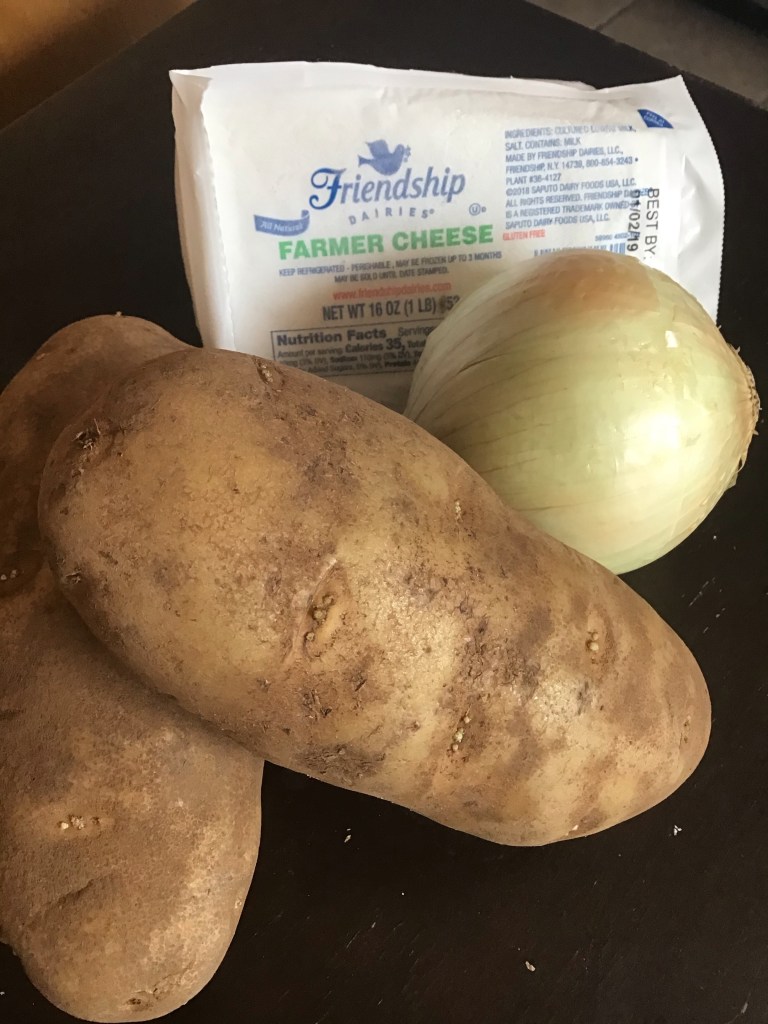
Ingredients: 5 lb bag of potatoes, peeled and cubed 3 lbs of farmers cheese or small curd ricotta 2 medium white onions, diced 2 tbsp butter or oil Salt, pepper, and lemon juice to taste
Preparation: 1. Boil potatoes until tender. Drain. 2. Heat oil or butter, then sweat onions in pan. Cook until translucent. 3. Mash together cooked potatoes, sweated onions, and farmers cheese until well blended. 4. Season with salt, pepper, and a splash of lemon juice. Blend and refrigerate.
Now on to the dough. If you don’t scale back the filling amounts you will have to make several batches of the dough recipe. Generally, once one batch is on the work surface to be rolled out, I start the next batch. The second dough will be able to sit while you work with the first.
Pierogi Dough. Yields approximately 25 pierogi.
Ingredients: 2 whole eggs 1/2 cup butter, melted 1/2 tsp salt 1 cup sour cream 6 cups flour 1 cup hot water
Preparation: 1. In a large bowl, mix eggs, butter, and salt. 2. Add sour cream. Mix until smooth. 3. Add flour a little at a time and mix until it gets pebbly. 4. Add water. Start kneading. 5. Let rest at room temperature, covered, for 30 mins.
Congrats! Now you have the components to make pierogi. It is usually at this point that I ask myself ‘what was I thinking?’ but figure I came too far to turn back now.
So what is next? Well grab your rolling pin, a ring mold, and a fork, and you will find out!!
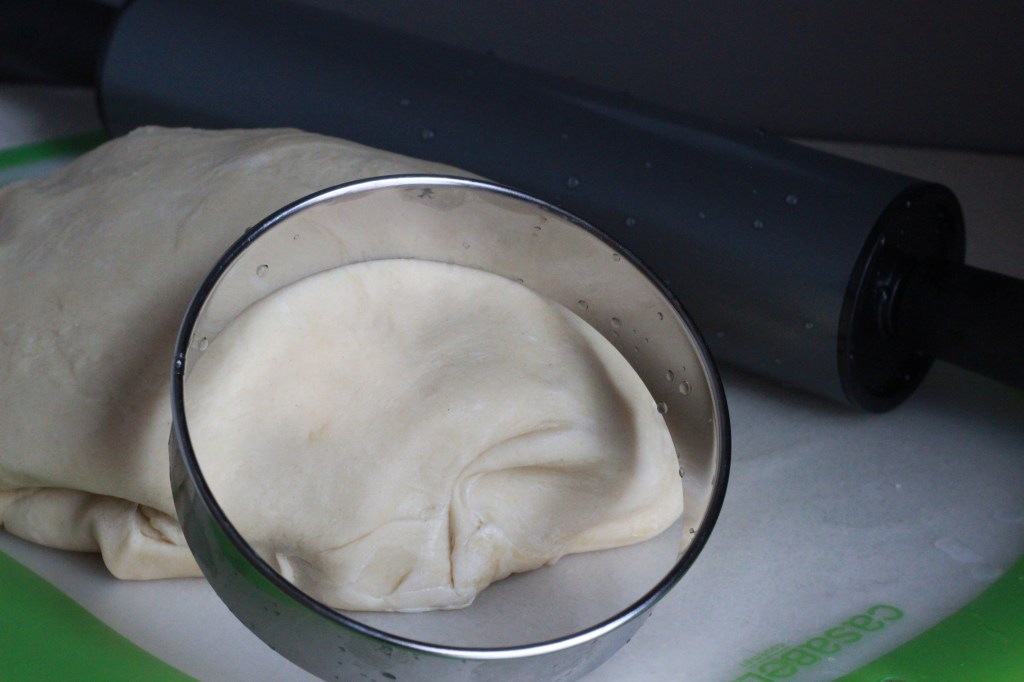
Divide your dough into four pieces for easier use. Dust your work surface with a bit of flour before beginning. With a rolling pin, roll out the dough till about 1/4 inch thick. Take your ring mold and cut out dough circles. They don’t have to be perfect.
Next place a healthy portion of your filling off center in your circle. The dough is stretchy so you will be able to fill it more than you think. The right portion may take a few pierogi to get used to.
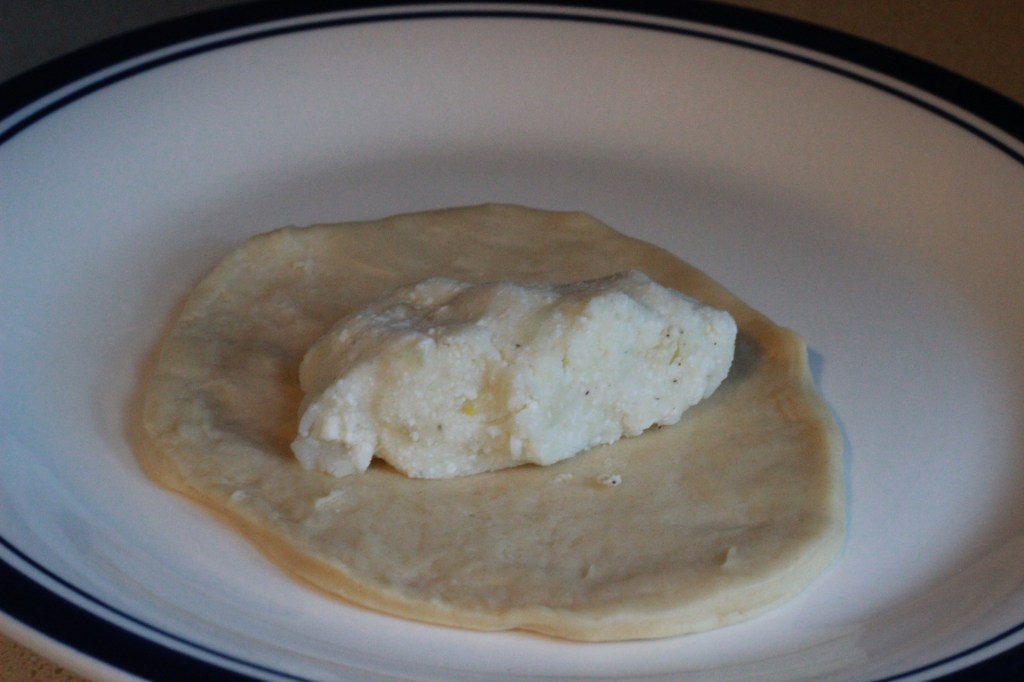
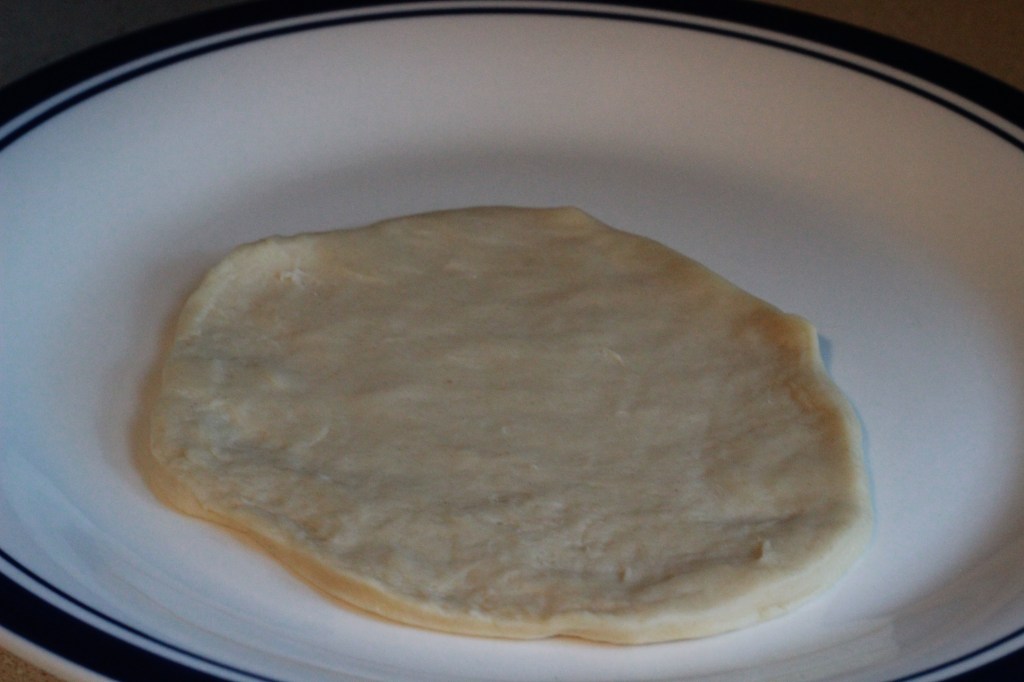
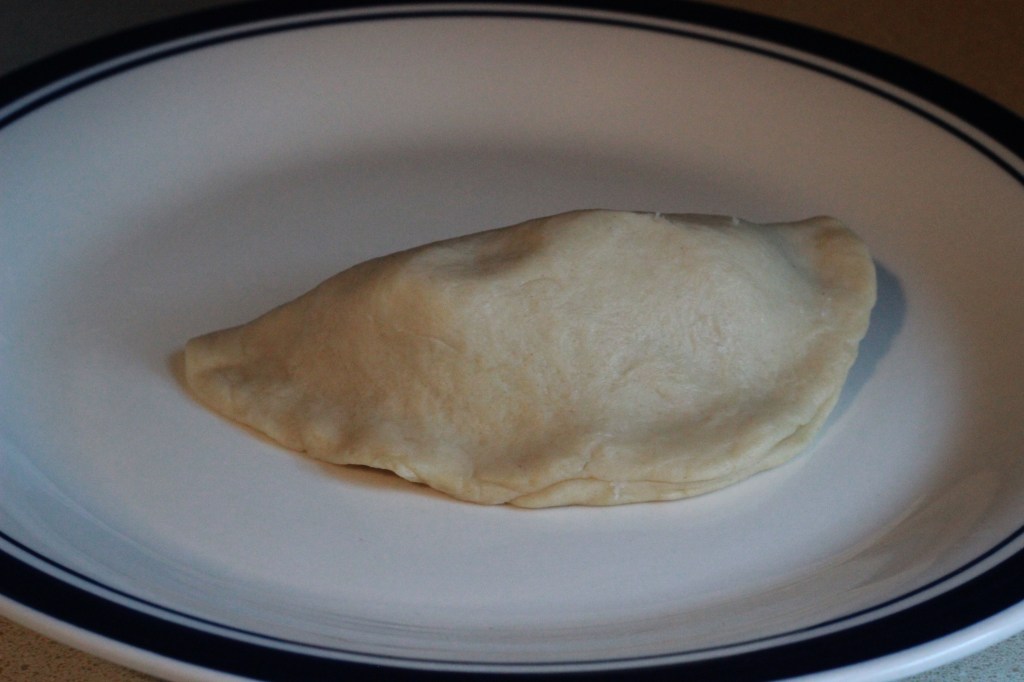
Next. Seal the pierogi. You may need to put a dab of water along the edge to help keep it closed.
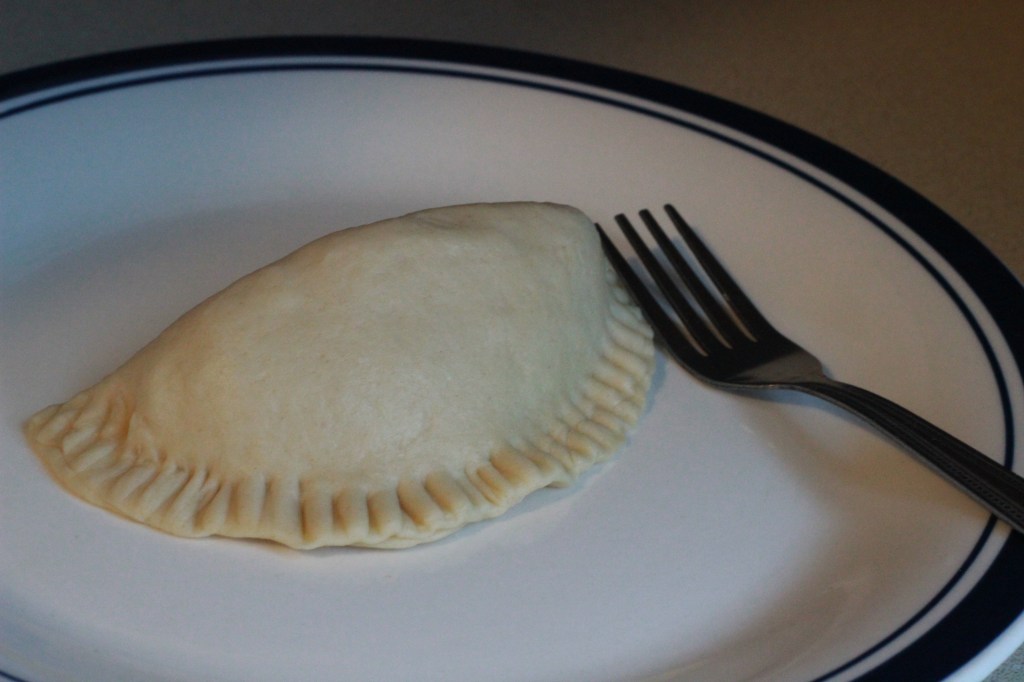
And then crease it with a fork. This will help keep it closed while also making it look pretty!
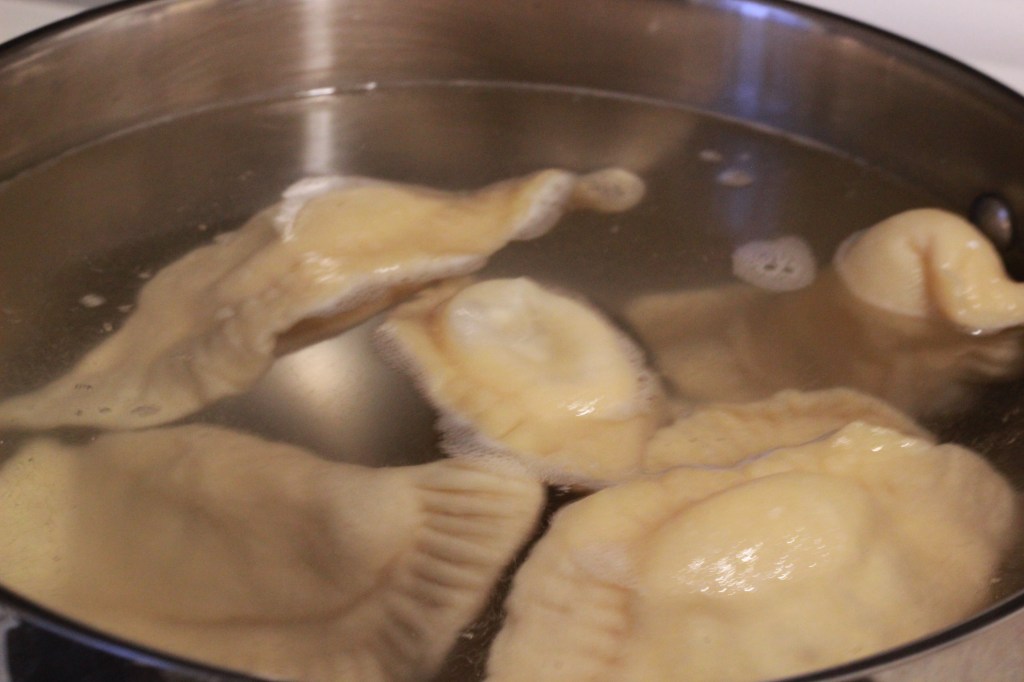
Finally, you will want to blanch them in boiling water. Once they begin to float they can be removed. Then chill them down and either freeze or refrigerate for when you want to eat them.
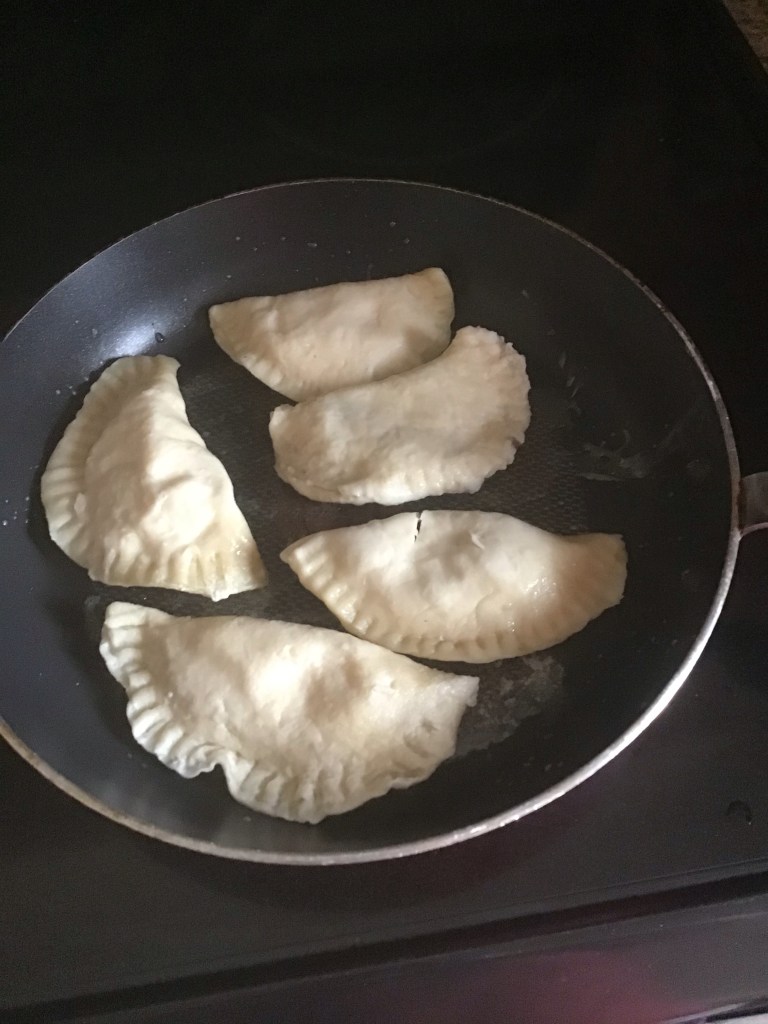
When the time comes to cook them off for consuming, you will need a nonstick sauté pan and preferably butter. Once the butter is melted, cook pierogi on both sides until slightly brown and crispy.
Enjoy the pierogies either as is or with sour cream and/or caramelized onions! And dont forget to wash it down with an ale! Na ztrovia!


love the recipe ! I will have to get adventurous and cook some 🥟 !!
LikeLiked by 1 person
Yum
LikeLike